So how do I print a pattern larger or smaller?
This is one of my most frequently asked questions, so here’s a quick guide on how to print patterns larger or smaller. You can print any of my patterns on any home printer, regular sized paper.
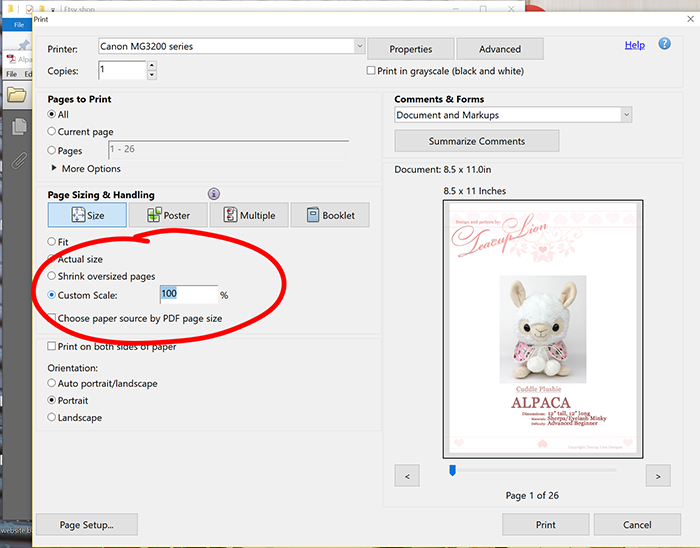
When you click File>Print (or Ctrl+P), you can adjust the percentage desired in these settings. For a plush twice as large, change 100% -> 200%, and so on.
If you are increasing the pattern size, select “Poster”. By selecting “Poster”, your printer will not only enlarge, but print the pages across multiple sheets of paper. You will have to use tape to put the pages together after they are all printed.
Once your patterns are all printed and taped, you will see that the seam allowance has also changed. You can either alter it now, or just measure it and keep it in mind as you sew, and use that measurement rather than the seam allowance in my patterns.
If every pattern comes at 100% by default, how do I figure out what percentage I need?
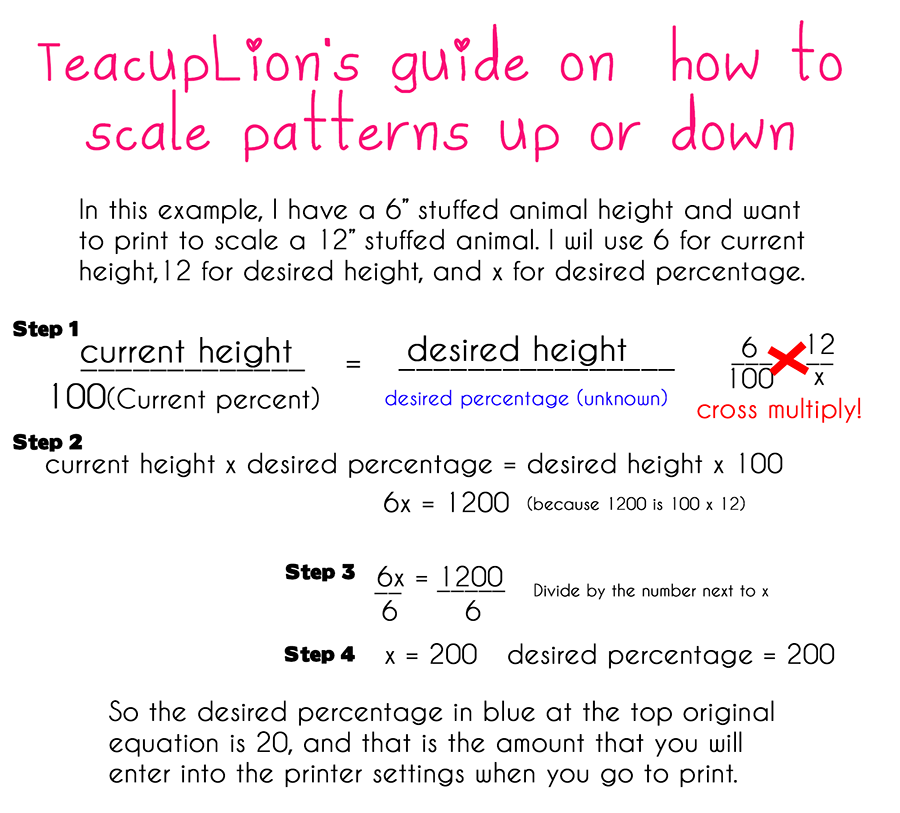
Algebra! If I have a pattern that makes a 6″ stuffed animal, and I want it 12″, this is a formula I use:

Other tools:
Convert inches to mm, cm, etc
https://www.calculatestuff.com/conversions/length-conversion
