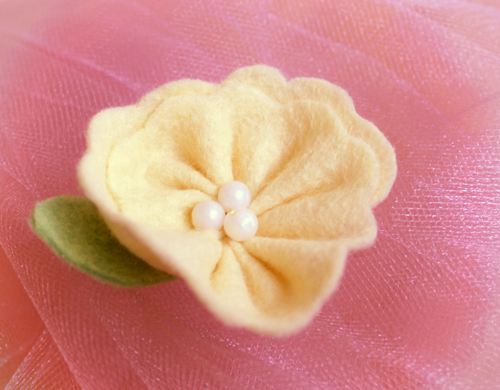
How to make your own gathered 2″ felt flower with bead accents with my easy-peasy tutorial :) It only takes a few minutes to make! You can use this to accent outfits, plushies, handbags, and more! I use wool blend felt for a high quality, super soft flower.
Materials needed:
- 9″ long x 2″ tall felt scrap for flower, optional green scrap for leaf
- Beads
- Handsewing needle
- Thread
- Small scissors
- Beads
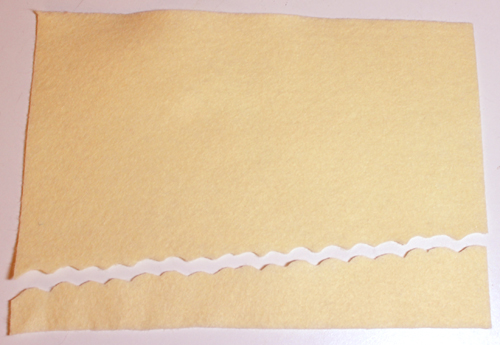
Cut a piece of felt angled as shown below – you can cut waves, scallops, or other petal shapes using your small scissors. If you want your flower to be larger, increase the height to larger than 2″; to be more layered, increase the degree of the angle. You can also add extra lengths of felt to attach more petals.
Thread your needle, knot your thread, insert your needle in the felt, and secure the knot to the felt with a loop by pulling the needle through the two strands near the knot. Hand-sew a gathering stitch 1/8″ from the edge, all the way to the end. The length of your stitches will determine how wavy your petals are. Do not knot your thread at the end.
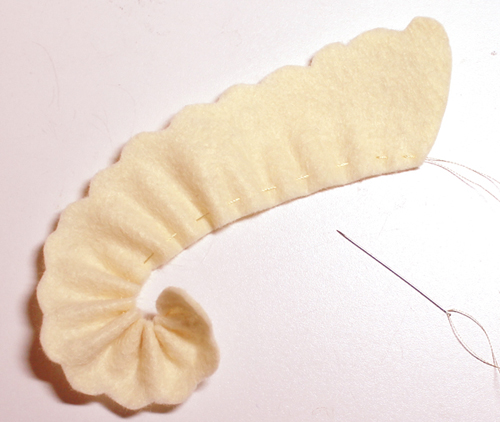
Tighten your thread while guiding the felt so that it curls into a flower shape. Hold or pin the base of the flower in place.
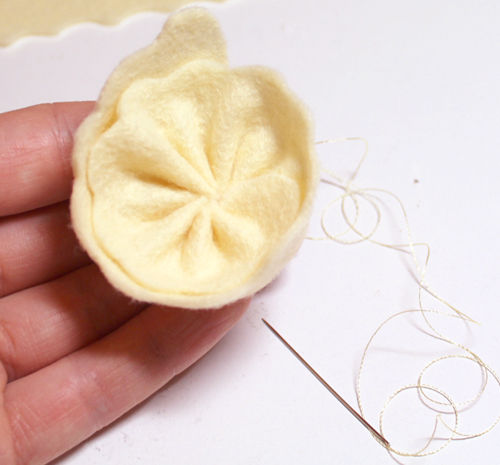
On the underside of the flower, secure the gathers to each other by stitching back and forth through different angles.
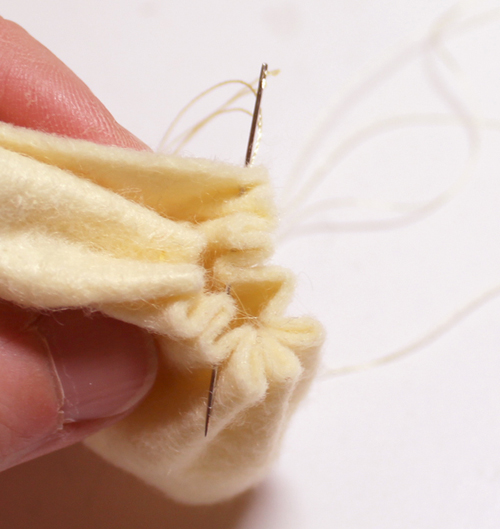
When finished securing the gathers at the bottom to each other, stitch up into the center base of the flower several times to secure the gathers down to the bottom.
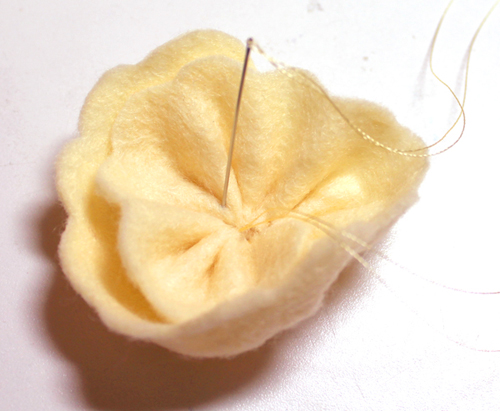
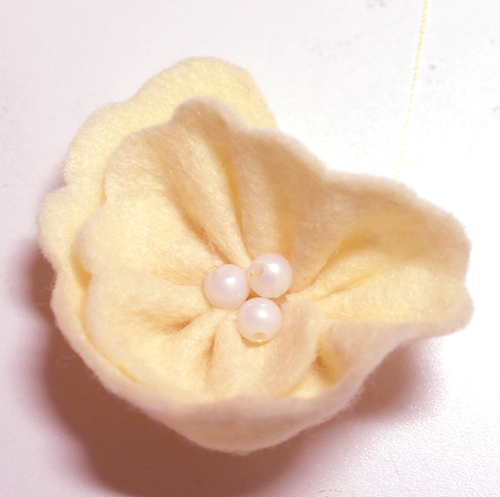
Once your gathers are secure, stitch up into the center, loop a bead on your needle, and stitch back down, pulling the thread tight.
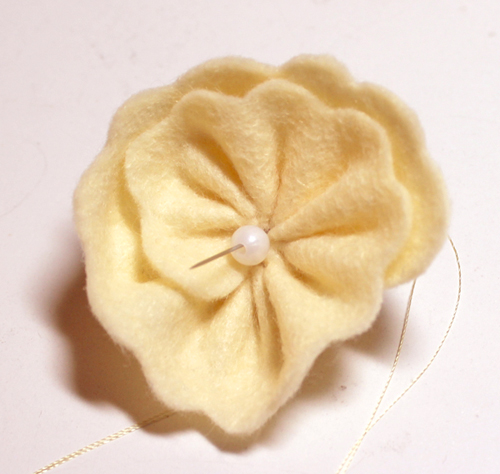
Repeat for all your beads. So pretty!
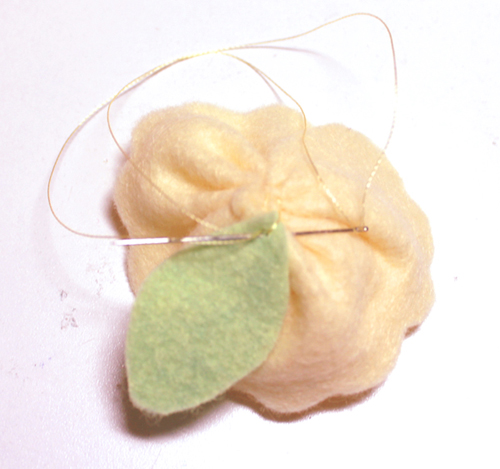
If you like, you can stitch one or more leaves to the underside as a finishing touch. Cut a small leaf-shaped piece of felt, and stitch it to the underside of the flower.
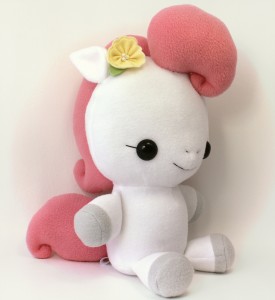
And, that’s it! You can hand-sew the flower to a clip, use a safety pin, or stitch it directly to a plushie or handbag. These are really fun and addicting to make. Hana the baby pony wears her flower beautifully, don’t you think?
Do share a photo if you try making some! :) Happy sewing!
Love, TeacupLion