Choosing the right fake fur fabric for your project will make your finished plushie more cohesive.
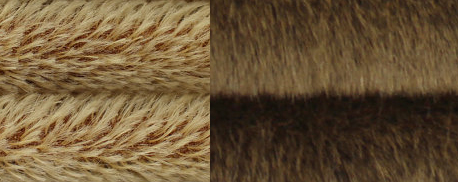
Quality: Usually goes hand-in-hand with price. A high quality fur will have a strong backing, thick fur, and feel soft. Quality can range from $8/yard craft fur that will feel and look cheap, to luxury imported fake fur used for heirloom-quality teddy bears.
At left: low quality fake fur, $10/yd. At right: high quality fake fur, $350/yd.
Pile: The length of the fur fibers from the backing to the tip of the fur. Choose this very carefully when considering the size of the toy you want to make. A 2” long fur on a 6” dog will cause all the details to become lost underneath all that shag. Consider using a shorter pile plush instead if you want to show details.
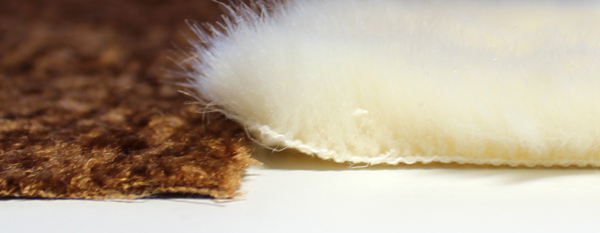
At left: 1/8″ pile. At right: 3/4″ pile.
Density: Dense, medium density, or thick fur fabrics will create a fluffy animal. Sparse, thin furs will give the appearance of a loved, antique, shedding animal. If you can easily see the backing underneath the pile, it’s a sparse fur fabric. This is a term more commonly used for mohair.
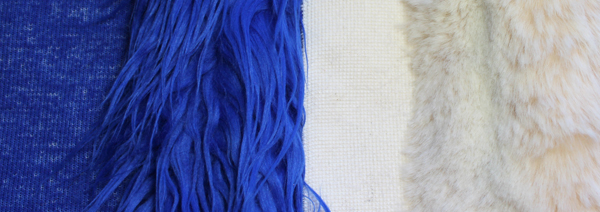
At left: Sparse mohair. At right: Dense faux fur.
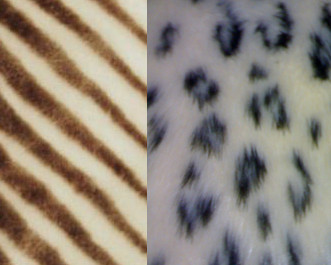
Pattern: Fur may have a design such as stripes or spots. These come in realistic shades meant to mimic real animal fur, or simple designs for cartoony or youthful pillows and toys. Make sure to pick a size that scales well with your intended project’s size and style. if you’re making a 7” realistic zebra, a 1” band-striped fabric will make your zebra look quite cartoony.
Tips for how to sew with fake fur:
- If you’re having trouble tracing the pattern because the fabric keeps shifting, use a thicker paper for your pattern, or use iron-on interfacing / freezer paper to transfer the pattern.
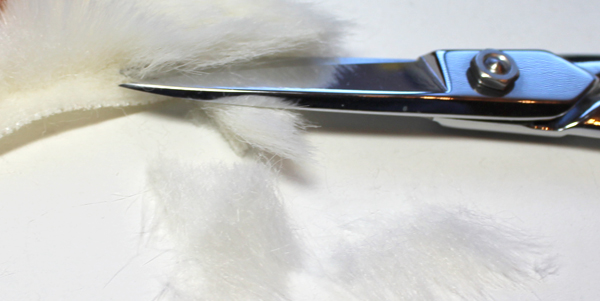
- When cutting your pieces, use box cutter, razor, or just the tips of sharp scissors to cut the backing only. Don’t cut the fur pile! It will leave ‘bald’ areas on your stuffed animal.
- Use a hand basting stitch first before sewing, as fur slips around easily. Remove basting stitches after machine sewing.
- Draw the stitching lines with water-soluble pen to use as a stitching guide.
- Use fray check on the edges for any fur fabric that frays.
- If your fur is dense, cut the fur pile away from a width just short of the seam allowance; if your seam allowance is ¼”, cut almost ¼” of the fur away from the seam allowance.
- Use long pins that won’t get lost in the fur.
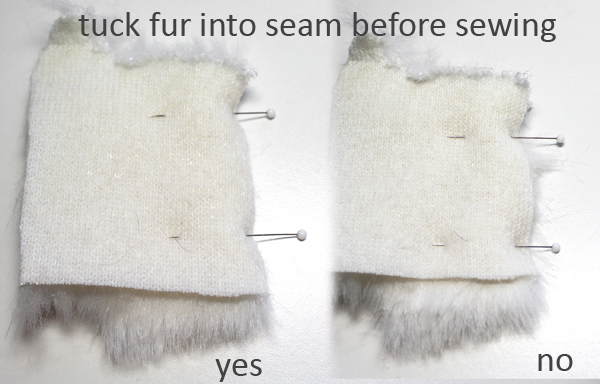
- Tuck fur pile into the plush before sewing, so that it doesn’t stick out of the seam.
- Sew with a large open zig zag stitch to make it easier to pull out fur trapped in the seam with a large needle.
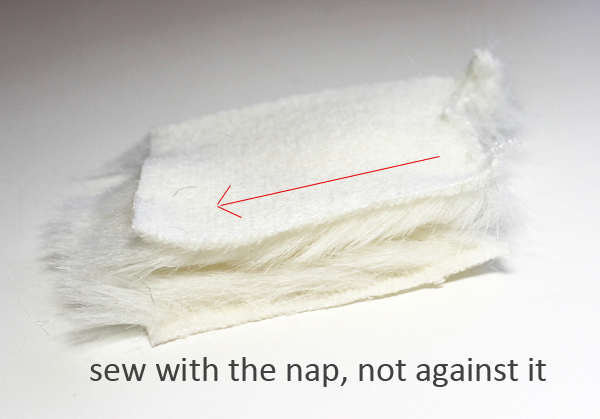
- When possible, sew with the direction of the nap, not against it.
- Clip curved edges. If your fur frays, use fray check after clipping curved edges.
- Use a doll needle, toothbrush, finger brush, or fur comb to brush fur out from within the sewn seam.